DIY FeedMyPaws Project: Dog Paw Print!

Hi everyone!
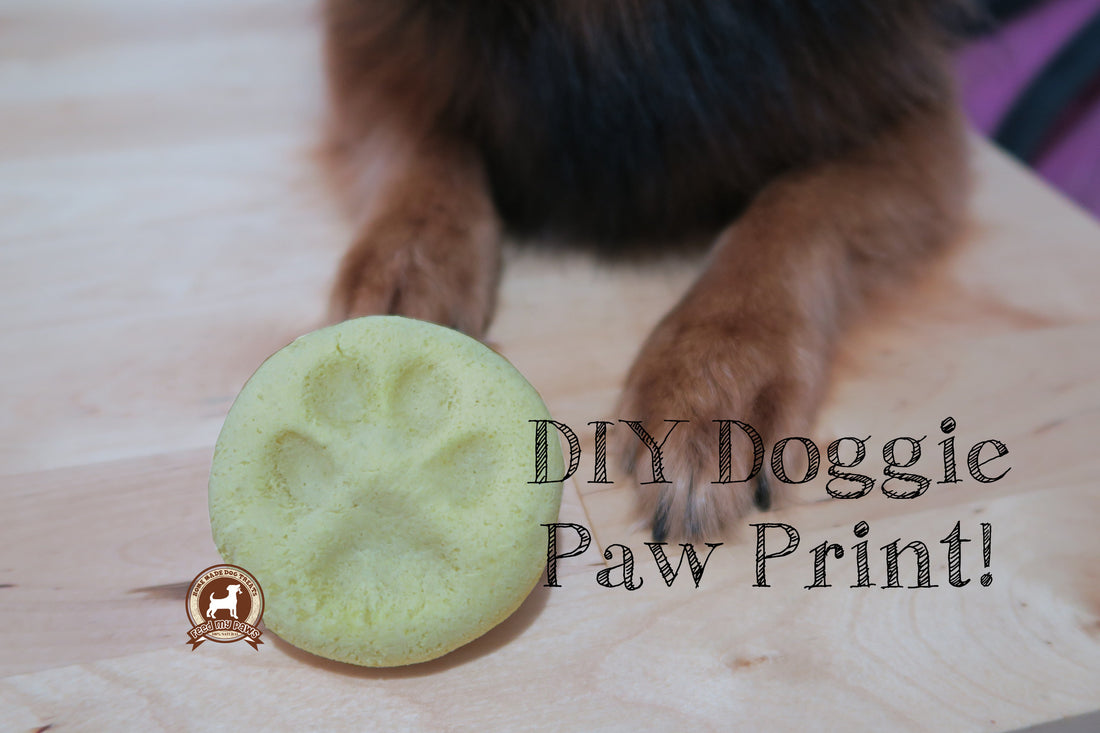
Today we're doing a slightly different tutorial: It's a DIY project! :) All you need are 2 main ingredients that you probably already have at home :)
INGREDIENTS:
- 1 cup plain flour *
- 1/2 cup salt
- Water (approx 3/4 cup)
- Optional: food colouring (I used turmeric for this one. However, because this isn't something for your dog to consume, you can feel free to use any crazy, artificial colours! I just didn't have any at home haha. I really wanted a bright pink one!!)
Bake at 180 degrees celsius for approximately 15 minutes. Baking is NOT compulsory for this project. You can air-dry it as well (takes 2-3 days). Baking simply accelerates the drying process.
*I recommend using any plain, white flour. Bleached or unbleached is fine. As your dog isn't going to eat this, any inexpensive flour will do :) Avoid self-raising flour though, your paw print will end up really bloated!
Tips after the video tutorial ;D
TIPS:
1.To store your paw print for longer, consider investing in a glaze that's used for acrylic paint. You can also use Mod Podge or other types of glaze used for polymer clay :) Otherwise, your paw print will probably only have a lifespan of about one week. IMPORTANT: ONLY GLAZE YOUR PAW PRINT AFTER IT'S DRY!
2. You can paint your paw print with acrylic paint once it's dry :)
3. You can air-dry this dough, although it might take up to 48 hours
4. The little cracks you see are pretty normal. You can add a little more water for a smoother dough but if you choose to bake instead of air-dry, you might still get some cracks :)
2 comments
i did this and loved it, my dog tried to eat the dough multiple times but so worth it!!
Hey! It sounds quite simple and easy. Thanks for sharing. Just wanted to know if it’s ok if we air dry it without any baking?